So you saw “Spider-Man: Into the Spiderverse.” You fell in love with it. And now you really want to cosplay Gwen with all her badassery: trendy haircut, eyebrow piercing, and of course, blue pointe shoes. There’s just one problem: you’re not a dancer. Or if you are then maybe your expertise lies in other realms of dance other than pointe. If this describes you and you are interested in cosplaying with actual pointe shoes then there are a few things you should know.
Take it from someone who has danced for 20+ years, it’s harder than it looks. And if you’re not accustomed to dropping $500+ on a cosplay, then the price tag alone for the pointe shoes might shock you. For shoes that fall apart so easily you’d expect them to be cheaper. Or maybe you’re thinking that if you drop $100 on a pair of shoes that they’re going to last a while. (Spoilers: they won’t. They will shred like crepe paper.) If you’re still interested in dropping some dough on these shoes with that knowledge, then this post is for you.
Getting your hands on a pair of blue pointe shoes isn’t the hardest part of this whole process. If you haven’t been trained on how to actually function in the shoes, then you’re at a serious risk of injury. Maybe you’re thinking “well I’m not actually dancing in them, I’m just standing for a few seconds to get a photo.” As a dancer who just took some really nice semi-professional pictures in my pointe shoes, it was way harder to hold a single pose for more than 30 seconds than it was to actually dance in the shoes. Well, maybe not quite, but the difficulty is real. And if you haven’t been training for this for several years then you’re at a severe disadvantage. Most dancers who dance in pointe shoes had to train literally for years in order to gain the ability to dance in those shoes. I started dancing at five years old and earned my pointe shoes when I was thirteen, and then I earned my toe shoes in Irish dance when I was fifteen. I’m certainly not a professional dancer by any stretch, however. After several injuries and pauses from dancing I know my own flaws and limits. It’s important to me to avoid more injuries, especially since nowadays I only dance for fun. So here are some tips to get some killer shots that make you look like a dancer without having any dance experience (and without risking injury).
1). Get professionally fitted
Pointe shoes aren’t like regular shoes. You can’t walk into a store and say “I’d like a size 8 shoe” and get shoes that fit. Each brand is slightly different, and each style produced by each brand fits a different type of foot. The only way to find the shoe that fits you well is to go to an actual dance store and ask an associate to help you find your first pair of pointe shoes. There may only be one brand that actually works for you, literally. Of course, if they ask questions and find out that you just want these for a costume then they will may be hesitant to sell them to you, but it will still be better than buying a random pair on the internet and hoping they fit. You may need to assure the salesperson that you will not be attempting any real pointe work.
You also probably won’t find a pair of perfectly turquoise shoes, at least not ones that fit you well. Most dancers have to dye their shoes if they want colored shoes to match their costumes. Dyeing your shoes is very easy and there are a number of excellent tutorials online, like this one (although you don’t necessarily have to dye the sole. I didn’t. You also don’t need to use a fabric marker if you are careful and thorough with your paint brush).
2). Toe pads
Honestly just walking around normally in pointe shoes can be uncomfortable if your feet aren’t used to it. Most dancers use toe pads in their pointe shoes to cushion their toes inside the rigid toe box, and they are definitely worth the investment. You can get these at any dance store. They are like little pockets that encase just your toes. Most stores carry both lambs’ wool pads and gel pads. I’ve always preferred gel pads, but it doesn’t really matter. Just get yourself a pair and thank me later. The toe pads should be worn inside your tights, not over the top.
3). Ribbons/elastic
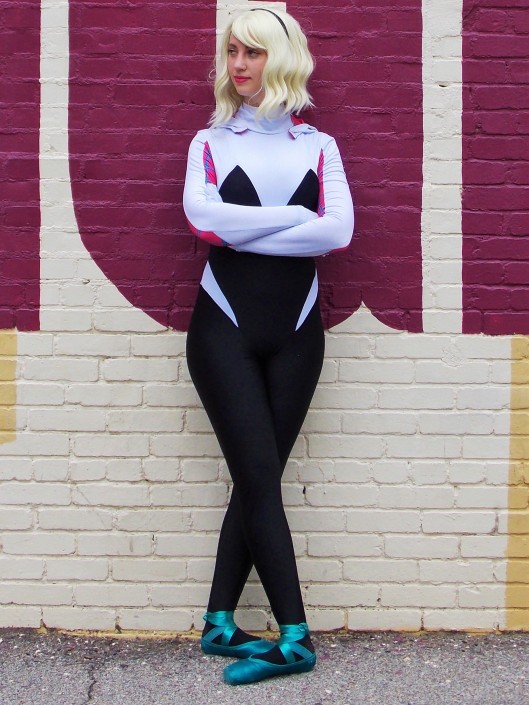
When I see pictures of Spider-Gwen cosplays, I can tell instantly if someone is a dancer or not by the way they tie their shoes. The way in which dancers tie their ribbons is actually something that protects your feet and ankles, so don’t try to do anything “fancy” because you think it looks cool.
When you buy your shoes they won’t come with ribbons or elastic already attached. You have to do that yourself. You should have a piece of elastic (around an inch wide) going over the bridge of your foot from just under your ankle bone, and then your ribbons (also about an inch wide) should be attached pretty close to the elastic. When you tie them, you should bring the ribbon from the inside of your foot up and over the top of your foot first, and then cross the other one over it. Wrap the ribbons around the back of your ankle and when you come to the front of your ankle the inside ribbon should cross first again before wrapping around. You should tie a small bow on the inside of your ankle, and then the important bit: tuck your bow underneath the ribbons on your ankle. If you do anything else, you will look ridiculous. If you criss-cross your ribbons all the way up your calf then somewhere a dancer will burst out laughing. Seriously. Just don’t do that. Ribbons twisted around your calf provide zero support, so you would never catch any dancer doing that in real life. The ribbons should cross twice around your ankle, overlapping, and then get tied and tucked close to your inside ankle bone.
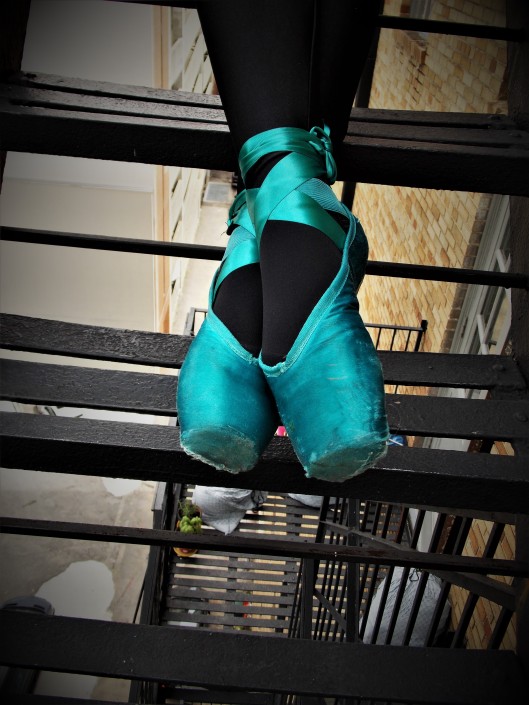
Well, my ribbons came slightly untucked in this picture, but you get the gist. Also, my shoes did not look this beat up at the start of the shoot. I can probably get one more decent urban photo shoot in these shoes before the fabric strips from the toe box.
4). Break in your shoes
If the shoes are new, then the sole will be too stiff and you won’t be able to arch your feet. A completely flat foot will be very obvious in pictures and you won’t achieve a dancer look with one. There are good tutorials online for ways to break in shoes, like here and here. Personally I tend to gently bend the arch back and forth a bit with my hands, and then I wore the shoes just around the house (part of that was just pure excitement at having new Spider-Gwen shoes and I didn’t want to take them off). The heat from your feet will help to mold the shoes to your feet.
5). Planning a photo shoot
Now that you have workable shoes, how do you take pictures that actually make you look good? You’ll need a couple of things, if possible: a barre (either in a studio or a handrail of some kind), a chair or bench, stairs, and some slippers that are large enough to fit over your pointe shoes (especially if you are planning an outdoor shoot) so that you can walk around with minimal wear and tear on the shoes. While waking around, keep your shoes inside the slippers and they will (hopefully) last longer. I would highly recommend not wearing the pointe shoes to a convention, however, especially if you’re going to wear them for longer than an hour or two. If you really want to do that, then I’d recommend bringing a pair of flats to change into. Or black chucks with the white sole painted blue, just like in the comics.
6). Five basic feet positions
Feet positioning is very important. There are five basic feet positions in ballet:
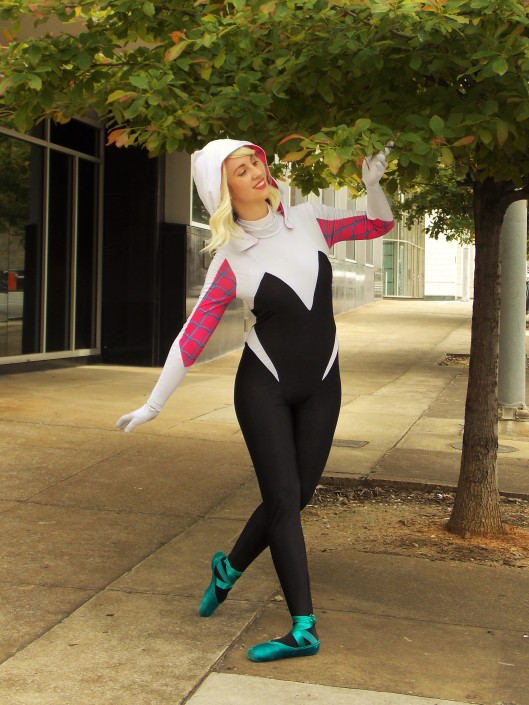
First position:
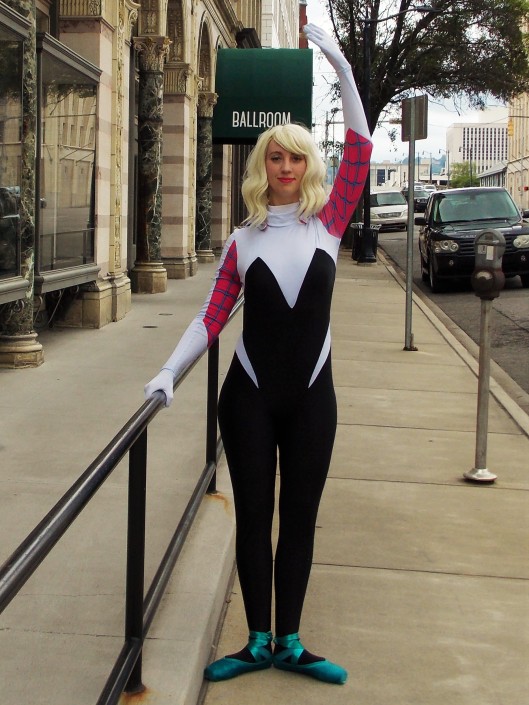
Your heels should be touching and your toes should be turned outwards. Pretty basic, but it will make your poses look like you know what you’re doing. If you want to attempt dancer arms too, then make sure your arm(s) have a gentle curve with no sharp elbows sticking out awkwardly. Fingers should be delicate. Your arm(s) can be up, like this picture, or in front of you, or out to the side.
Second position:
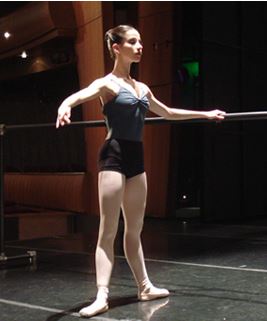
I didn’t take any pictures of me in second position, flat footed, so here’s a stock image. Your feet should look similar to first position (toes facing out), but your feet should be about shoulder width apart.
Third position:
Third position is weird, and not as frequently used. Your feet should look similar to the above two positions (toes pointing outwards), but the heel of one foot should be touching the inside arch of the other foot. Think about placing one heel about halfway up your other foot.
Fourth position:
One foot should be in front of the other and your toes should be facing out (right toes pointing right, left toes pointing left). There should be a separation between your feet, with your back toes in line with your front heel. There should probably be a few more inches between my feet in this picture, but I was balancing on a curb while trying to figure out how to make it look cool. As this picture was taken I was saying “nah this feels dumb,” but it’s the only example I have of fourth position so here it is.
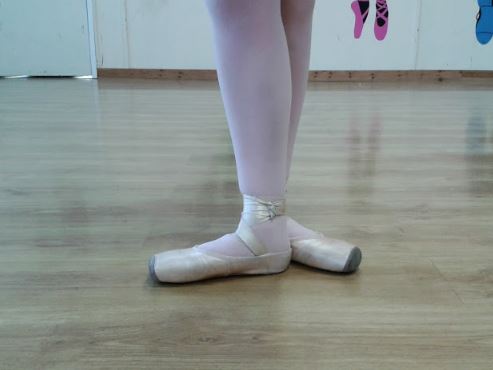
Fifth position:
One foot should be in front of the other, and the heel of your front foot should be touching the toe of the back foot. Your toes should be pointed out (right toes pointing right, left toes pointing left). As you can see here, you don’t have to have “dancer arms” to look cool. Gwen is graceful, but also sassy. And a drummer in a band.
7). Standing poses that show off the pointe shoes
Okay, so all of the above poses you could do in any shoes. But you have pointe shoes for reason, right? Unfortunately here’s where I try to hammer home the importance of not doing stunts. If you haven’t been taught the best way to do it by a dance teacher, then you shouldn’t be standing with your full weight on your toes. Even if you don’t get hurt, it will look bad and any person who has ever danced that sees your photo and cringe at the memory of that pain of not having the proper form. But even if you aren’t going up on both toes at the same time, or trying to balance on one toe, there are still loads cool things you can do.
One toe up:
Pointe shoes have this wide, flat surface on the toe, so use it. With one foot firmly planted (toes turned out, of course), your other foot can be resting on that toe box. Make sure that you have the entire toe box touching the ground. If you are pushing your foot too far forwards or backwards, you won’t be making contact with the ground with the whole flat surface, and you will look weird. In order to do this properly you will need to arch your feet, and in order to do that your shoes will need to be at least semi broken in. Whatever you have to do, just arch your feet and make sure you aren’t balancing on the ridge of the toes.
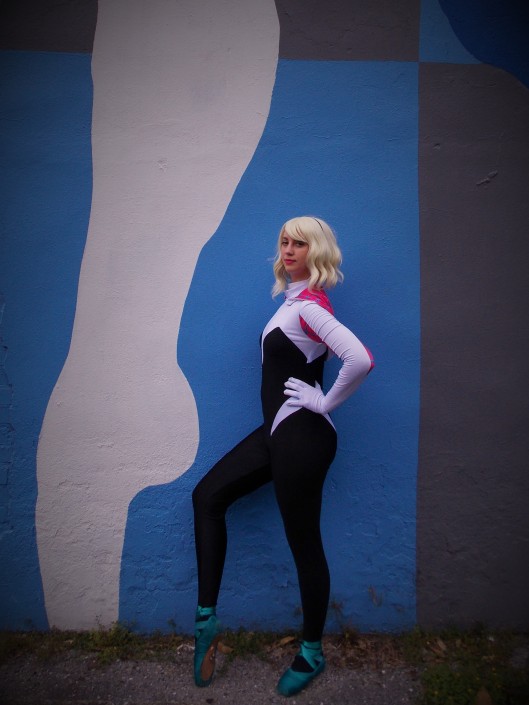
One foot pointed behind:
Again with one foot firmly planted (toes facing out), you other foot is free to point in any direction. Having it delicately placed behind you like this opens up loads of possibilities for poses, but you could also have the leg extended straight out in front or to the side. As best as possible, try to arch your foot that is pointing.
One foot on a chair:
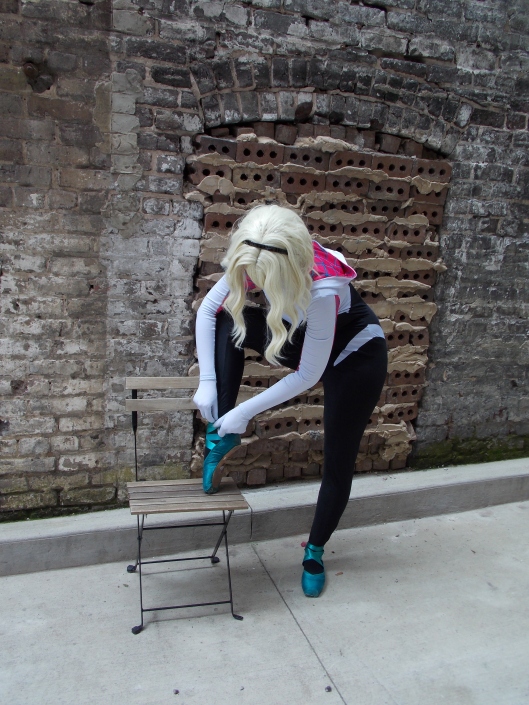
This was a candid shot, but I liked it a lot. I rested my foot up on a chair to adjust my ribbons, and it offers a real glimpse into the dancer experience. My foot isn’t resting squarely on the toe box, but it should be for an optimal picture.
8). Barre poses
If you can get a barre or some sort of handrail for your photo shoot, you will look pretty legit. You may be tempted to hang onto the barre with both hands and push yourself up onto both toes, and that is definitely safer than doing it without a barre, but it’s still dangerous and without dance training you’ll probably look weird. It takes a lot of practice to figure out how it feels to balance on your toe box, and if you do it wrong you can seriously hurt your ankles so it’s honestly not worth it. What you can do, though, is stuff like this:
One leg on the barre:
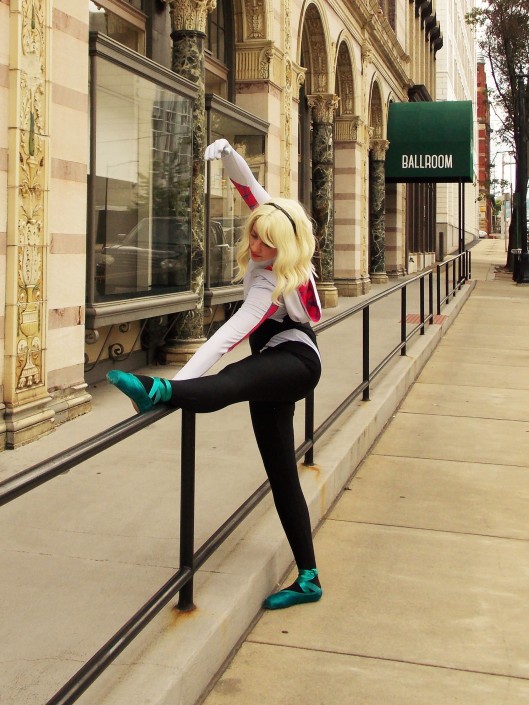
Stretching poses are always good, and useful for you too.
Pointing toe:

Just about anything where you have at least one hand on the barre and your feet are delicately posed will look cool. If you follow the five basic positions from above, you can extend one leg into a point, or even lift one leg off the ground in any direction.
9). Sitting poses
There are so many things you can do while sitting, so here are just a few examples:


If you have your toes resting on anything, like a bench or the floor, just make sure that your toe box is squarely on the ground. Other than that, have fun with it!
10). Stairs
The last shots that I’ll recommend are shots on stairs. They create a pretty cool effect, especially for making your legs look long and graceful. Things like this:


Make sure that your toes are pointed, and crossed ankles will always look graceful. There are plenty more poses that I didn’t include here because honestly the permutations are infinite, but whatever you do and however your style your Spider-Gwen cosplay, make sure you that aren’t doing anything that requires putting your weight on your toes (including classic crouching spider poses) if you weren’t trained on how to do that. As long as you avoid that, your pictures can look pretty darn great.
For more cool Spider-Gwen pictures, feel free to follow me on Instagram @sewmuchlife!